It is now December 30th, so as some of you may know, MAGFest is very close now. This means hordes of people and lack of sleep for the next four days, but I think it will be fine. On a related note, it seems that Twin Galaxies is going to make an appearance at the event. For those who don't know, this is the organization that claims to be the "official" world record site for gaming or some such. Keyword is "claims," because Twin Galaxies is a joke.
Regardless though, it could be amusing to see what happens when SDA members and Twin Galaxies members meet each other. Or better yet, what happens when those guys see the two panels set up for SDA at MAGFest. "Boo! Hiss! WE are the official record keepers because Guinness says so!" Oh, this could be fun.
Anyway, I've made sure to make a checklist of items to bring and take back from the event, so I shouldn't have any of that "ARGH! I forgot Mr. Snuggles!" crap. The checklist changes as I think of more things, but as of right now, the bag I'll be taking seems like it will weigh a ton. It's better to be prepared though.
Two of the obvious items on that checklist are Shin Ankoku and my DS Lite (no DSi for me, thanks). I'm still completely serious about attempting a run while I'm there, but the camera that Nate is providing (as in, I'm going to borrow) has a technical problem of some sort. He can't get the thing to power on, so it's either a problem with the camera itself or the battery. The battery is the cheaper fix to try, so he bought a new one and had it shipped to Mike's house. If this battery really does the trick, then I hope to return with good news about the run. If it doesn't fix the problem, many gigafrowns will be had.
Speaking of Shin Ankoku, you may or may not have noticed that someone was kind enough to comment on my 15.43 post. I would like to draw attention to that fact because the guy is planning to do a single-segment run of the game, and I would like for those of you who have advice to maybe pitch in an idea or two. I know this suggestion hasn't worked in the past, but a "shout-out" of sorts seems like a good way to raise awareness (at least). Honestly, I haven't given a ton of thought to specific plans outside of the segmented pure speed category, so I probably won't be able to help all that much. This is where you (the reader) come in...hopefully.
Also on the list are all three Kessen games and my Playstation 2, since I plan to spread the joy of that series to at least one new person. For those of you who look at my YouTube channel from time to time (thanks) and are wondering "when will these Kessen III videos end," I can somewhat safely say that the uploads will be completed at some time during MAGFest. There are 34 battles in total, but I made something like 38 videos in all. Please don't hate me for this.
I plan to take a lot of pictures and/or record videos at the event, so you may want to check back here on January 4th (some late hour) or 5th if that sort of thing interests you. Also worth mentioning that if someone who is reading this right now is also going to MAGFest, you should look for me. I'll obviously be with the SDA crowd, and I'll probably be the only one in the group wearing a button-up long-sleeve shirt or checkered sweater.
I think I'm done with this post. I'll save my rambling about various other games for a later date, so as to not crowd this one any further. Wish me luck at the event (please?) and I'll be back here to go on about it sometime soon.
Tuesday, December 30, 2008
Friday, November 21, 2008
15.43 is even more ridiculous.
(Click image for larger version.)
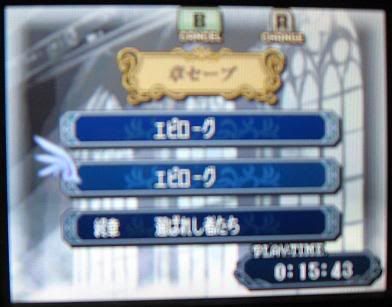
Yes, you read that correctly. I did another run of Shin Ankoku with one major change and a tedious amount of optimization. 15.43 is the time I received for my efforts. I'll only go into brief detail about the changes I made this time, but I should point out that another improvement hit me at around Chapter 15 of this run.The idea is to make sure Boa (who would've thought?) survives Chapter 12 and then replace Rena with him for the rest of the game. This would cut experience gain from that point on by about half, greatly reducing the time wasted in level up screens. It's also helpful that his growths are pathetic, because less stat increases on level up = less time spent. It also has to be Boa, because no other unit besides Rena will ever join with a C (or higher) staff level.
As for notable changes, look at my 16.57 plan and then make these adjustments:
1. Prologue-3 is solo Marth. Use one Vulnerary if necessary.
2. Rapier counter critical on the boss of Chapter 1.
3. Warp Marth to the boss in Chapter 7 and counter kill him. I used the save point for a Silver Sword kill, which required at least one critical, but you can afford the Rapier in this case (send it back and fish it out next chapter if you use it). This is the major change I mentioned earlier, and according to the results listing, it saved a whopping 23 seconds. For the record, this is HALF of the 16.57 version.
4. The first Warp staff will break during Chapter 11. Not a problem.
5. In Chapter 17, I had Jeigan weaken (a kill would've given him a level up, which is bad) the Warp Thief. Wolf grabbed two items from Jeigan (Wolf will now have four items) and finished him off. The Thief drops a Door Key and then the Warp staff, so you'll blow right past the Door Key message and then send the staff back. Genius, I tell you.
Note that I used Wolf because my Zagaro was dead. GameFAQs users would hate me for that.
6. Self-defense only for Chapter 19.
7. Swap Rena to one space below Marth in Chapter 20 and don't use Vulneraries. On Marth's second turn of running back to the right after visiting the village, have Rena swap the 1 use Warp staff with Hammerne and then repair it. Fetch it back on the next turn, before sending Marth to Lawrence (he's still cannon fodder). Do not use either of the save points.
8. Drop whoever is two spaces to the right of Marth in Chapter 25 and replace him/her with Ellis. Double Warp and win as usual, but remember to go for a one-hit kill on Medeus using Marth.
9. When a unit's movement menu comes up (attack, wait, etc.), pressing X will automatically select the currently equipped weapon/staff. It's not a huge deal, but I learned to use this at some point in the run.
10. Same as above, but I used Y to select the Fake Falchion for Medeus. Hoorah.
Finally, I'd like to note that the times listed in the results add up to 14.50. Sub-15 = WHEE!
P.S. MAGFest is going to be painful, if I go through with my plan to run the game for real while I'm there. This just set the bar far too low to be comfortable. That's good though, right?
Thursday, October 9, 2008
Mortal Kombat: Annihilation
Yes, I really did decide to watch this awful movie again. The first time I viewed it was a long time ago on Pay-Per-View, and I remember the movie sucking huge goat nuggets. After watching the movie this time, I can safely say that my conclusion remains unchanged. So many things were wrong about the movie that it's somewhat hard to cover everything, but I'll try to make a list anyway:
1. Very bad casting call on Shao Kahn, and his skull helmet was a complete joke. The dude mostly lacked the "awesomeness" (I'll use that term loosely here) of the video game version of Shao Kahn. No "you will die" comments, no finger waving, and he hardly used the hammer of doom at all.
2. Rayden, what the fudge happened to you?! You went from being a really cool dude that would always serve as a deterrent against Shang Tsung's rule breaking, to some complete pansy. To make things worse, the new Rayden becomes even more of a pansy when he becomes mortal! How is that even possible?
3. Some love story bits were attempted in this movie. That should be self-explanatory, but for those who don't get it, let me say this: The only "love" that should be in a Mortal Kombat movie is somebody who "loves" to pound the other person's face in. The only exception I'm willing to make is some sort of short smooch at the very end of the movie, for "ha ha, happy ending" reasons.
4. The costumes literally looked like something you would find at a cosplay convention. Enough said.
5. Johnny Cage is killed within the first few minutes of the movie, and he doesn't even put up much of a fight. He just does a special flying kick and then gets his neck snapped a short while after that. Who was the moron who decided to write that in there? Talk about getting off on the wrong foot...
6. Too many characters. Seriously, it's like they threw most of them in there for the sake of completion. Who needs character development? Not the people who made the movie, that's for sure!
7. The bad script did not help the mostly bad acting. One can only do so much when they have to say stupid things like "Find your animality" and "Shao Kahn is my brother." Robin Shou was about as acceptable as you'd expect him to be (he's a martial arts guy, so cut him some slack), but Shao Kahn had a William Shatner complex. Honestly, he would say quite a few of his lines like this: "Prepare for..........the final battle!"
8. Sonya fights (and wins against) Mileena in a mud fight. You don't get much more shameless than this, folks.
9. After winning said fight, a very large and poorly animated creature comes out of a statue and tries to eat Sonya. That is, until Jax shows up and...rapidly punches it in the left side of its body. This causes it to eventually go ARGH and slide back into the ground. Words simply can't do justice to how bad that scene is, so if you ever stumble across this movie, take a look for yourself. I guarantee you'll laugh in disbelief, and then die a little inside.
10. Animalities are things that are somewhat acceptable in a video game, but not in a live-action movie. The whole concept is stupid, but apparently the script writer was absolutely determined to add as much stuff from the game series as possible into one movie. Because of this, you get retarded things like Nightwolf's "three tests" (what is this, Zelda?) and the horrendous fight scene near the end of the movie.
11. As I just mentioned, there is a fight scene near the end of the movie where Liu Kang has to unleash his animality to have a chance against Shao Kahn. You already figure that you're in for some stupid stuff when you see his eyes change color, but then the crap hits the fan when he becomes a large and poorly animated dragon.
At this point, you're already in disbelief that they are seriously trying this, and then they see fit to make it worse. How can they make this any worse, you ask? That's right, by making Shao Kahn use his animality too, becoming a giant three-headed hydra. So here you are, watching two awful monsters fight each other. The movie title suddenly switched from "Mortal Kombat: Annihilation" to something like "Beast Wars: In 3-D!"
Thankfully, the scene is fairly short. They kick butt and then revert to human form for the rest of the movie. Huzzah, I guess.
Now, with all of this said, I should note that the movie does have some good points (as few and far between as they are):
1. The guy playing Jax was actually pretty good at times. I'd say that throughout a lot of the movie, the way he recited his lines sounded pretty natural. Certainly better acting than most other characters in the movie, at the very least.
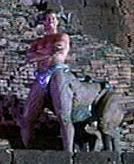
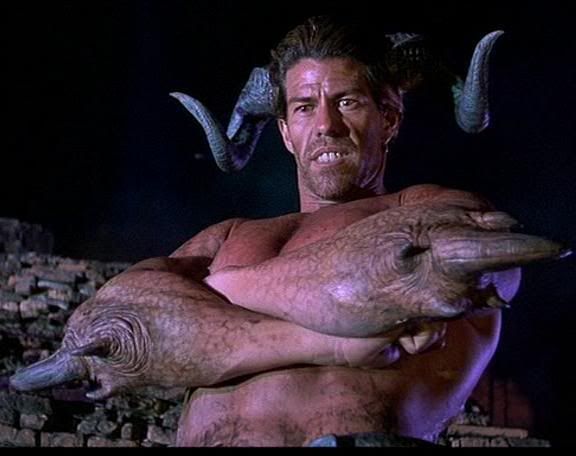
2. Motaro was very well done, for a freaking live-action centaur. In fact, this is what I think centaurs (or creatures like them) should look like on screen. The approach was pretty simple: human body for the upper half, and use some fairly believable computer imagery (or was that a costume?) for everything else.
Compare this to garbage like the Scorpion King from The Mummy Returns, and Motaro wins any day of the week. If you don't believe me, watch both movies and laugh at how ridiculously stupid the Scorpion King looks.
For those who don't want to bother, here are two shots of Motaro from the movie (click the second picture for a larger version):
3. Kitana played her part pretty well, but there isn't much else to say.
As for the good points, those are about it. I seriously don't recommend watching this movie if you have to pay for it in any way, shape, or form. If you can bum it off a buddy or something like Netflix though, feel free to do so when you're in the mood for a laugh or two (or if you're a masochist). If anything, check it out simply for the Motaro/Scorpion King comparison.
I suppose I should assign a number to this movie to make it more of a real review, so I'll give it a 4/10. It's not an unbearable movie, but you likely will lose a few brain cells from the experience. If you really want to do yourself a favor though, you'll go watch Mortal Kombat instead and realize/remind yourself what a great video game movie looks like.
1. Very bad casting call on Shao Kahn, and his skull helmet was a complete joke. The dude mostly lacked the "awesomeness" (I'll use that term loosely here) of the video game version of Shao Kahn. No "you will die" comments, no finger waving, and he hardly used the hammer of doom at all.
2. Rayden, what the fudge happened to you?! You went from being a really cool dude that would always serve as a deterrent against Shang Tsung's rule breaking, to some complete pansy. To make things worse, the new Rayden becomes even more of a pansy when he becomes mortal! How is that even possible?
3. Some love story bits were attempted in this movie. That should be self-explanatory, but for those who don't get it, let me say this: The only "love" that should be in a Mortal Kombat movie is somebody who "loves" to pound the other person's face in. The only exception I'm willing to make is some sort of short smooch at the very end of the movie, for "ha ha, happy ending" reasons.
4. The costumes literally looked like something you would find at a cosplay convention. Enough said.
5. Johnny Cage is killed within the first few minutes of the movie, and he doesn't even put up much of a fight. He just does a special flying kick and then gets his neck snapped a short while after that. Who was the moron who decided to write that in there? Talk about getting off on the wrong foot...
6. Too many characters. Seriously, it's like they threw most of them in there for the sake of completion. Who needs character development? Not the people who made the movie, that's for sure!
7. The bad script did not help the mostly bad acting. One can only do so much when they have to say stupid things like "Find your animality" and "Shao Kahn is my brother." Robin Shou was about as acceptable as you'd expect him to be (he's a martial arts guy, so cut him some slack), but Shao Kahn had a William Shatner complex. Honestly, he would say quite a few of his lines like this: "Prepare for..........the final battle!"
8. Sonya fights (and wins against) Mileena in a mud fight. You don't get much more shameless than this, folks.
9. After winning said fight, a very large and poorly animated creature comes out of a statue and tries to eat Sonya. That is, until Jax shows up and...rapidly punches it in the left side of its body. This causes it to eventually go ARGH and slide back into the ground. Words simply can't do justice to how bad that scene is, so if you ever stumble across this movie, take a look for yourself. I guarantee you'll laugh in disbelief, and then die a little inside.
10. Animalities are things that are somewhat acceptable in a video game, but not in a live-action movie. The whole concept is stupid, but apparently the script writer was absolutely determined to add as much stuff from the game series as possible into one movie. Because of this, you get retarded things like Nightwolf's "three tests" (what is this, Zelda?) and the horrendous fight scene near the end of the movie.
11. As I just mentioned, there is a fight scene near the end of the movie where Liu Kang has to unleash his animality to have a chance against Shao Kahn. You already figure that you're in for some stupid stuff when you see his eyes change color, but then the crap hits the fan when he becomes a large and poorly animated dragon.
At this point, you're already in disbelief that they are seriously trying this, and then they see fit to make it worse. How can they make this any worse, you ask? That's right, by making Shao Kahn use his animality too, becoming a giant three-headed hydra. So here you are, watching two awful monsters fight each other. The movie title suddenly switched from "Mortal Kombat: Annihilation" to something like "Beast Wars: In 3-D!"
Thankfully, the scene is fairly short. They kick butt and then revert to human form for the rest of the movie. Huzzah, I guess.
Now, with all of this said, I should note that the movie does have some good points (as few and far between as they are):
1. The guy playing Jax was actually pretty good at times. I'd say that throughout a lot of the movie, the way he recited his lines sounded pretty natural. Certainly better acting than most other characters in the movie, at the very least.
2. Motaro was very well done, for a freaking live-action centaur. In fact, this is what I think centaurs (or creatures like them) should look like on screen. The approach was pretty simple: human body for the upper half, and use some fairly believable computer imagery (or was that a costume?) for everything else.
Compare this to garbage like the Scorpion King from The Mummy Returns, and Motaro wins any day of the week. If you don't believe me, watch both movies and laugh at how ridiculously stupid the Scorpion King looks.
For those who don't want to bother, here are two shots of Motaro from the movie (click the second picture for a larger version):
3. Kitana played her part pretty well, but there isn't much else to say.
As for the good points, those are about it. I seriously don't recommend watching this movie if you have to pay for it in any way, shape, or form. If you can bum it off a buddy or something like Netflix though, feel free to do so when you're in the mood for a laugh or two (or if you're a masochist). If anything, check it out simply for the Motaro/Scorpion King comparison.
I suppose I should assign a number to this movie to make it more of a real review, so I'll give it a 4/10. It's not an unbearable movie, but you likely will lose a few brain cells from the experience. If you really want to do yourself a favor though, you'll go watch Mortal Kombat instead and realize/remind yourself what a great video game movie looks like.
Monday, September 29, 2008
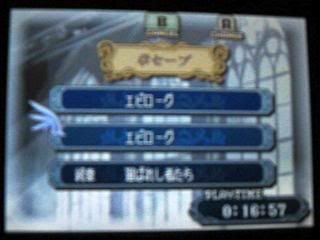
16.57 is ridiculous.
I'm late posting this, but I'll go ahead and note that I completed my fourth (and likely final) test run of Shin Ankoku on September 24th. The final time was 16.57, and I can honestly say it that would be outrageously difficult to lower that by a substantial amount.
I looked over my third run and determined some things that I could cut out, and so no shopping or forging is done at all this time around. I also made sure to use all three save slots in order to be extra picky about the time for each chapter, and for maximizing Marth's level ups. While this made the whole process take a lot longer to complete, it definitely paid off for my in-game time.
Edit: Screenshot added because I can (click for larger version):
Chapter breakdown:
Prologue 1: Make sure Marth gains strength, at the very least. Speed is no doubt helpful, but he needs that point of strength to one round that Axe Fighter in Prologue 2.
Prologue 2: Only move Marth and obtain as many self-defense kills as possible, since they are quicker. Ignore the Archers.
Prologue 3: Only use Marth and Jeigan here, but have Freyr give Marth his Iron Sword and Vulnerary on turn one. Jeigan's purpose for this chapter is merely to soak up some damage and kill the yellow square Mage. Use Vulneraries with Marth as necessary, because hoping for fantastic evade is too absurd to bother with.
Prologue 4: Marth should kill the Hand Axe guy on turn one, and then Jeigan slaughters the Archer on turn two by using the Silver Lance. Marth is to move toward the boss while Jeigan's only remaining purpose is to kill Gordon (easily faster than sacrificing a unit).
If things have been going properly, Marth's Iron Sword should be at 6/40 when approaching the newly opened door. Two of those go to the Archer in front, and the other four obviously go to the two Soldiers standing behind that guy. All so very convenient, don't you think?
Anyway, the rest is simple. Move Marth up and Rapier the boss into a pile of goo. Be ready to skip the scene and the reinforcement appearance soon after emerging from the other end of the Gordon area.
Chapter 1: This one is extremely straightforward. Marth moves above the left tree on turn one, to the middle tree (it should be obvious which one I mean) on turn two, and then make your way to the boss from there. If you get lucky, the Hunter will attack from one space below and to the left of Marth, making the move to the left slightly faster.
For the boss, you have a decision to make: strike first and waste time with the pre-fight dialogue and Enemy Phase heal (all of which can be sped up, but still wastes some frames anyway), or counter critical at some single digit percentage. Keep in mind that you have no save points to make use of to make this manipulation easier.
Chapter 2: Move Jeigan onto the north bridge, so that he can protect your other wimps. This is important, because less characters risks getting slapped with a Gaiden chapter, which is unacceptable in all cases except 24x. Marth moves left and eventually crosses the river manually, getting a ton of self-defense kills. Kill the boss in self-defense as well, and a winner is you.
Chapter 3: Move Rena down, Marth obviously goes left, and leave Julian to rot. Continue to move those two units until Rena is very close to the fort, at which time you should move Jeigan two spaces above that fort. Keep a close eye on the radar on the top screen as turns begin/end, so that you can tell if Jeigan survives or not. If he dies, Rena is obviously going to become toast, which is crippling.
After stopping Marth next to the boss, I'd recommend pressing L and having the nearest unit use the save point at the starting location. Manipulate a low chance critical and win.
Chapter 4: Equip Marth with a Rapier (or do this in Chapter 3, which may be a better idea) and Warp him to the boss. Marth should have a full inventory by this point, so when he counter kills the boss (which is very important), you should send the Rapier into storage. Hope that Marth kills the peons so that the gate is clear, then seize. Send the Knight Killer back when you get the free Silver Sword.
Chapter 5: Marth goes to the boss and you should leave everyone else to rot. I had Marth kill the boss with a Rapier while standing on his left side, but standing below him probably works just as well. Standing on his right side is a bad idea because if Marth takes damage, you'll waste time from the auto-heal. Send the Rapier back if you want to be sure of the usage.
Chapter 6: Warp Marth and counter kill the boss with a Rapier, which will likely require at least one critical hit. Send it back if you wish.
Chapter 7: Only deploy Marth and move toward the right side of the boss when you get the chance. You should probably send the Rapier back.
Chapter 8: Warp Marth and drop the boss in self-defense (as usual).
Chapter 9: Warp Marth and win. You can pretty much use whatever weapon you want, so send back the Door Key that the boss drops.
Chapter 10: Warp Marth and hope the boss dies during the Enemy Phase. Send the Rapier back when he does. Minerva will likely commit suicide, so send her axe back too.
Chapter 11: Warp Marth and win. If you have any trouble here, you're a moron.
Chapter 12: Kill the Warp Thief with a person that has a full inventory, and then have Rena fetch it from storage and use it. Send Marth to the right side of the boss and drop the Priest. Smoke the boss on the next turn, and then seize on turn three. Obviously, he'll need some luck to survive all this.
Chapter 13: Warp Marth to the boss and drop him, since you can't do so in self-defense. If he gains a level from this kill or from killing Astoria, waste a turn and let the level up occur during the Enemy Phase of turn one (from Astoria). Even though it increases your turn count by one, it should be a tiny bit faster overall (especially if it was some sort of super level up).
Chapter 14: Warp Marth and counter kill the boss with a Rapier, then send it back. Hope that Rena dodges the ballista shot during the Enemy Phase, because a single shot will more than likely kill her. Use the unit count and/or radar to determine her status before turn two begins (to save time).
Chapter 15: Warp Marth to the generic "boss" and then drop him, since you can't get a self-defense kill here. Extremely easy chapter.
Chapter 16: Warp Marth to the left side of the boss and Rapier counter kill him (send it back). You'll also need to hope Marth survives, because he'll be enduring some serious abuse. If an enemy clogs the gate before turn two, restart.
Chapter 17: Move Jeigan and Zagaro toward the area where the Warp Thief will escape to. Avoid being in range of the Armor Knights on turn one, and then rush in after that. Warp Marth to the boss one turn before obtaining the new Warp staff. Kill the boss in a counter and then use Jeigan and Zagaro to kill the Warp Thief (send the staff back, if possible) before seizing the throne.
Chapter 18: Warp Marth to the left side of the boss and counter kill him with the Rapier. Definitely send the thing back afterwards, because you don't want to slaughter the whole army in that area with it.
Chapter 19: Warp Marth to Chiki and it's up to you whether to strike first or not. I'd probably do that, since her damage might be a little excessive considering you need Marth to survive several magic attacks and some Heroes.
Chapter 20: This one suffers from the lack of Boots. Drop someone from your group so that Rena can be one space below Marth, Warp Marth to the village, visit it, and then have him run back to the right (using Vulneraries on the way, if need be). Your next goal is to have Rena meet him and then Warp him to Lawrence so that he can recruit him that turn (cannon fodder).
While doing this, move Zagaro or some other high movement unit toward the save point. Save on the turn that you send Marth to Lawrence, in case Camus roasts Marth. Saving obviously wastes time though, so if you feel confident in Marth's survival skills, avoid the save entirely.
Chapter 21: Send Marth to the boss on turn one and repair a Warp staff on turn two. If you are having troubles with that Enemy Phase, you could try repairing first and sending Marth over later. This will cost you a turn though, so keep that in mind.
Chapter 22: Warp Marth to the boss and hope for survival and a clear gate. Seize on turn two.
Chapter 23: Warp Marth to the generic boss and hope things go well (pretty easy, actually). Seize on turn two.
Chapter 24: Same as the plan for Chapter 22.
Chapter 24x: Same as the plan for Chapter 22, but with a throne instead of a gate. One or two of your units might die here, but it doesn't matter (as long as it wasn't Rena or Ellis).
Chapter 25: Drop everybody except Marth, Rena, and Ellis. Give Ellis one of Rena's Warp staves and make sure both of them are in position near Marth. Warp Marth and Nagi to either side of the Mamkute and have Nagi drop him. Use Marth to critical Medeus for the kill. Keep in mind that you need 23 strength to kill Medeus in a single shot (with the fake Falchion) and that you will save a good chunk of time by making it a one shot kill. No save points are available to you, so I highly recommend saving after the preparations.
Well, there you have it. That is how I did this 16.57 run, and that is how I think any run of this game should go. Good luck to anybody who wants to try this.
Friday, September 19, 2008
Three test runs and counting.
I did another run this morning (finished at some time after 3 A.M., at least), and improved my time to 23.58. I won't be recording the results video for it this time, but I did log the times and turn counts: http://www.geocities.com/kessenaddict/shinankokutimes.txt
I cut out a lot of excessive inventory and unit management, and cut back on the shopping. I still ended up with some more gear than I needed though, so I think it is best to do absolutely no shopping at all. The gold bag from the chest in Chapter 6 never served a purpose this time around, so drop that too. Also, I need to keep a better eye on Marth's stats next time (if there is a next time), because he suffered from stupidly low skill all game long.
Marth lacked the strength to one shot Medeus by having only 22 strength when you need 23 (at least), and also lacked the speed to double. Therefore, my only choice was to have Marth take care of the Mamkute guard and let Nagi handle Medeus. The things is, Marth also lacked the speed to double that guard, and so he required a critical to drop him. Combine this with Nagi's need of a critical (for that same reason) on Medeus at 9%, and you have a recipe for pain.
To somewhat fix this, I forged a higher critical rate on Marth's Silver Sword (using all the on-hand money I could), giving it +17%. This brought his total to 24%, which is somewhat acceptable. I got both the necessary criticals after a fairly short round of attempts, so all is well.
By the way, for those who care, I let quite a few people die (on purpose).
Wednesday, September 17, 2008
Four more playthroughs.
It's been a LONG time since the last update, I know. I completed Hard 5 a long time ago and four other playthroughs since the last update. These playthroughs were (in order): all Gaiden chapters, Marth + generic replacements, test speed run, and another test run. All four of those were done on Normal mode, for those who care.
List format because I'm lazy:
1. Gaiden chapter requirements are stupid, and the chapters themselves are mostly meh. 24x and the one with Etzel were interesting though, because of their layout. 24x is a Fuuin 16x clone (towers) and Etzel's chapter has the only instance of indoor areas being masked until you open the door (or get close enough, in one case). Other than that, the Gaiden chapters just carry a short-lived "oh, neat" effect.
2. Generic units are interesting at first, because who hasn't wanted to throw some random units around in a Fire Emblem game (outside of Thracia)? Unfortunately, once the few chapters of novelty wears off, things just get horribly BORING. Their growths are awful, so giving them level ups is pretty much pointless. The only possible way to produce any real "fun" from using generic units is if you play on a harder setting (like Hard 5), but even then, there is no good reason to use any of them for more than meatwall duty. Take my advice, and NEVER try this playthrough (unless you plan to convert it into a Marth solo).
3. Test run one was done in less than a day, without much more than basic planning. It was rough in quite a few areas, but the overall time wasn't too bad for a first attempt: 1:08.07. The main idea of any run is to do a Marth solo (basically) with Rena making smart use of the Warp and Hammerne staff. A video of my results is here:http://www.youtube.com/watch?v=9ewNtbOq7qU
4. I did another test run the next day, knowing that I could shave off at least a few minutes from the previous attempt. Imagine my surprise when I achieved a final time of 32.01! I had written down some basic plans for each chapter, and included which ones to use Warp on. I also made sure to fix a mistake from last time, which was "ARGH, I didn't train Marth enough early on." By wasting some time to let Marth soak up most of the early game experience, he becomes more than capable of quickly completing chapters. In this case though, his defense was a bit poopy early on and so I had to have Jeigan help him out.
Anyway, the plans went well for the most part. Chapter 12 gave me some trouble though, because the idea was to kill the Warp Thief with someone that had a full inventory, send it to the convoy, and then have Rena fish it out and use it. Marth gets sent to the Boots chest, opens it, and spends a little time waiting for the two Mages to go up the left side of the map. Marth's resistance sucks, so dealing with them AND the other enemies is not a smart idea. It works out decently, because you get the chance to use a Vulnerary or two and/or the Boots while hiding in the closed room.
For those who may be curious, here is the rough document I wrote up:
P-1: Straightforward.
P-2: Kill everyone with Marth?
P-3: Kill everyone with Marth?
P-4: Kill everyone with Marth.
1: Kill everyone with Marth.
2: Marth left, people die.
3: Marth left, Oguma fort/mountain. No Warp.
4: Warp Marth and win. (6)
5: Use Marth and win. No Warp.
6: Warp Marth and win. (5)
7: Use Marth and win. No Warp.
8: Warp Marth and win. (4)
9: Warp Marth and win. (3)
10: Warp Marth and win. (2)
11: Warp Marth and win. (1)
12: Marth kills the Armor Knights, someone kills the Warp Thief, Warp Marth to Boots, and win. (1/6)
13: Warp Marth and win. (1/5)
14: Warp Marth and win. (1/4)
15: Warp Marth and win. (1/3)
16: Marth counter-kills the three Dragon Riders, Warp Marth to boss, and win. (1/2)
17: Move up-left and ambush the Warp Thief, Warp Marth to the boss, and win. (1/1/7)
18: Warp Marth to the boss (left-side) and kill him with a full inventory (to send the Rapier away). (1/1/6)
19: Warp Marth to Chiki and win. (1/1/5)
20: Warp Marth to village, recruit Lawrence, and win. (1/1/4)
21: Warp Marth, repair a Warp staff, and win. (7/1/3)
22: Warp Marth and win. (7/1/2)
23: Warp Marth and win. (7/1/1)
24: Warp Marth and win. (6/1/1)
24x: Warp Marth and win. (5/1/1)
25: Warp Marth, Warp Nagi, and win. (4/1)
At the end, I use Rena and Ellis to send Marth and Nagi (joins in 25 if you went to 24x) to Medeus. Nagi annihilates the Mamkute in front of him, and Marth uses the wimpy Falchion to kill Medeus. In this case, Marth was capable of dealing 17 damage per hit (Medeus has 60 HP here) with an 8x% hit rate and 8% critical. Luckily, Marth was fast enough to double, so all I had to do was keep restarting the chapter until one of the hits was a critical. Best case scenario is if you get a Marth capable of dealing 20 damage per hit, but I'm not sure if that is possible without the orb that negates any terrain bonus. Getting said orb would waste more time than it saves, by the way.
Gold is a bit of an issue throughout this run, because I like to have a decent load of general purpose swords for Marth to use AND a forged Rapier + forged Dragon Killer. I had Julian grab the first chest in Chapter 6 (money bag), since it was helpful and easy to get. Other than that, the only other gold I remember grabbing was in Chapter 1.
I'll probably do another run at some point, with some more tweaks. At the very least, I'll look at what I ended the game with this time and drop the excess. Combine that with better levels for Marth early on, and I can see sub-30 minutes happening.
Finally, here is a video of my second run results: http://www.youtube.com/watch?v=Jr-ukF5FSn4
List format because I'm lazy:
1. Gaiden chapter requirements are stupid, and the chapters themselves are mostly meh. 24x and the one with Etzel were interesting though, because of their layout. 24x is a Fuuin 16x clone (towers) and Etzel's chapter has the only instance of indoor areas being masked until you open the door (or get close enough, in one case). Other than that, the Gaiden chapters just carry a short-lived "oh, neat" effect.
2. Generic units are interesting at first, because who hasn't wanted to throw some random units around in a Fire Emblem game (outside of Thracia)? Unfortunately, once the few chapters of novelty wears off, things just get horribly BORING. Their growths are awful, so giving them level ups is pretty much pointless. The only possible way to produce any real "fun" from using generic units is if you play on a harder setting (like Hard 5), but even then, there is no good reason to use any of them for more than meatwall duty. Take my advice, and NEVER try this playthrough (unless you plan to convert it into a Marth solo).
3. Test run one was done in less than a day, without much more than basic planning. It was rough in quite a few areas, but the overall time wasn't too bad for a first attempt: 1:08.07. The main idea of any run is to do a Marth solo (basically) with Rena making smart use of the Warp and Hammerne staff. A video of my results is here:
4. I did another test run the next day, knowing that I could shave off at least a few minutes from the previous attempt. Imagine my surprise when I achieved a final time of 32.01! I had written down some basic plans for each chapter, and included which ones to use Warp on. I also made sure to fix a mistake from last time, which was "ARGH, I didn't train Marth enough early on." By wasting some time to let Marth soak up most of the early game experience, he becomes more than capable of quickly completing chapters. In this case though, his defense was a bit poopy early on and so I had to have Jeigan help him out.
Anyway, the plans went well for the most part. Chapter 12 gave me some trouble though, because the idea was to kill the Warp Thief with someone that had a full inventory, send it to the convoy, and then have Rena fish it out and use it. Marth gets sent to the Boots chest, opens it, and spends a little time waiting for the two Mages to go up the left side of the map. Marth's resistance sucks, so dealing with them AND the other enemies is not a smart idea. It works out decently, because you get the chance to use a Vulnerary or two and/or the Boots while hiding in the closed room.
For those who may be curious, here is the rough document I wrote up:
P-1: Straightforward.
P-2: Kill everyone with Marth?
P-3: Kill everyone with Marth?
P-4: Kill everyone with Marth.
1: Kill everyone with Marth.
2: Marth left, people die.
3: Marth left, Oguma fort/mountain. No Warp.
4: Warp Marth and win. (6)
5: Use Marth and win. No Warp.
6: Warp Marth and win. (5)
7: Use Marth and win. No Warp.
8: Warp Marth and win. (4)
9: Warp Marth and win. (3)
10: Warp Marth and win. (2)
11: Warp Marth and win. (1)
12: Marth kills the Armor Knights, someone kills the Warp Thief, Warp Marth to Boots, and win. (1/6)
13: Warp Marth and win. (1/5)
14: Warp Marth and win. (1/4)
15: Warp Marth and win. (1/3)
16: Marth counter-kills the three Dragon Riders, Warp Marth to boss, and win. (1/2)
17: Move up-left and ambush the Warp Thief, Warp Marth to the boss, and win. (1/1/7)
18: Warp Marth to the boss (left-side) and kill him with a full inventory (to send the Rapier away). (1/1/6)
19: Warp Marth to Chiki and win. (1/1/5)
20: Warp Marth to village, recruit Lawrence, and win. (1/1/4)
21: Warp Marth, repair a Warp staff, and win. (7/1/3)
22: Warp Marth and win. (7/1/2)
23: Warp Marth and win. (7/1/1)
24: Warp Marth and win. (6/1/1)
24x: Warp Marth and win. (5/1/1)
25: Warp Marth, Warp Nagi, and win. (4/1)
At the end, I use Rena and Ellis to send Marth and Nagi (joins in 25 if you went to 24x) to Medeus. Nagi annihilates the Mamkute in front of him, and Marth uses the wimpy Falchion to kill Medeus. In this case, Marth was capable of dealing 17 damage per hit (Medeus has 60 HP here) with an 8x% hit rate and 8% critical. Luckily, Marth was fast enough to double, so all I had to do was keep restarting the chapter until one of the hits was a critical. Best case scenario is if you get a Marth capable of dealing 20 damage per hit, but I'm not sure if that is possible without the orb that negates any terrain bonus. Getting said orb would waste more time than it saves, by the way.
Gold is a bit of an issue throughout this run, because I like to have a decent load of general purpose swords for Marth to use AND a forged Rapier + forged Dragon Killer. I had Julian grab the first chest in Chapter 6 (money bag), since it was helpful and easy to get. Other than that, the only other gold I remember grabbing was in Chapter 1.
I'll probably do another run at some point, with some more tweaks. At the very least, I'll look at what I ended the game with this time and drop the excess. Combine that with better levels for Marth early on, and I can see sub-30 minutes happening.
Finally, here is a video of my second run results: http://www.youtube.com/watch?v=Jr-ukF5FSn4
Thursday, August 28, 2008
Shin Ankoku: Who cares what day?
I'm now up to Chapter 8 on Hard 5, and I have a confession to make: I...used a save point once. Yes, it is very shameful to do such a thing, but believe me when I say I wasn't eager to make the decision to use it. Here's the situation:
Pretty late in Chapter 5, with Social Knights and Pegasus Knights spawning out of various forts at an absurd rate (they appear on the beginning of the Enemy Phase too). The Social Knights aren't a huge concern, because I could've easily made a chokepoint or two and healed the meatwall(s) while blasting away.
The real problem was with the Pegasus Knights, because chokepoints mean nothing to them. In addition to this, they were armed with Javelins, which does not bode well for a meatwall (Steel Lance hit from the Social Knight and then a Javelin hit would easily be fatal). They were so powerful that even Wolf or that other Horseman were completely worthless against them, because a Steel Bow hit would not be fatal and they would receive a fatal double in return. Stupidly, the only unit capable of winning against one of them with some ease was Marich with Excalibur.
Anyway, the mistake I made was actually the second time I did it in the same attempt, so you'd think I would have learned from before. The mistake was to get too aggressive, which lures a Pegasus Knight towards my main team (on the right side of the map). Because of this, you end up with two choices: retreat and make absolutely sure to limit the attacks received to one round per unit (any more would be fatal), or go all out and limit the attacks received by reducing enemy count.
The first choice tends to run into problems with movement. Your weaker characters have a harder time getting behind your new wall, and Social Knights have 9 movement, which makes an effective wall difficult to construct.
The second choice was what I went with the second time around, and is the reason I used the save point. There were three enemies left in the area (one Pegasus Knight and two Social Knights), and I had used a unit or two more than I would've liked. I was left with a few specific units to kill off some rather super enemies, so things were pretty bad.
Once I finally decided on a plan, I knew Sheeda would be required to drop the full HP Social Knight in a single hit, because evade is pretty unheard of in this game (excluding ballistae attacks). To do this, I needed a critical hit at around 23% with the Wing Spear, and by this point, I wasn't fond of the idea of staking my progress on such low odds. This is why I saved.
Sure enough, the first try gave me a normal hit. I reset and then tried again, and got the critical hit I needed. After that, the chapter was mostly a cakewalk (especially because I had a save to fall back on if I really wanted).
So there you have it. I still strongly disapprove of using save points, but I feel it was slightly justified in this instance. Regardless though, what's done is done.
Monday, August 25, 2008
Shin Ankoku: Day 9
I completed Normal mode in somewhere around 23 hours. The game sort of gets old as you get close to the end, but I had a lot of saved up Warp uses to get things over with fairly quickly at the very end.
Speaking of the end, Medeus's battle model is stupid looking. It doesn't even come close to looking as good as Monshou Book 2's version (which was awesome), but I suppose it's a small step up from Book 1. Or at least, it would be, if the 3D model used for him didn't suck so much; because of that, it becomes a contest between poor 3D and a giant yellow mole.
Also worth noting that the ending, regardless of the fact I can't understand anything that was said, looked terrible. Some short dialogue (considering it's supposed to be an ending) between various people, a picture, and then very short endings for each character. Was it too much to ask to get an ending worth watching at least once? What happened to the "perfect" ending from Monshou? That sucker was long and seemed to contain tons of information.
Anyway, now that I've checked around various areas online, I'll note some things:
1. Normal mode is the only mode with Freyr and some replacement dork named Naron. I can see that changing, simply because adding a new character for only one mode (Naron doesn't matter much) isn't a good idea.
2. The reason they aren't available is because the Prologue maps are skipped entirely in Hard mode. This means it's a good thing I chose to play Normal first! :)
3. I started a Hard level 5 save (screw the stuff in-between!) a while ago, and WOW is it hard. It's like playing Souen Maniac all over again, only with an even less capable Jeigan (heh, get it?). Keep in mind, I'm only on Chapter 2, so this statement about the difficulty could change as I get farther in the game.
That said, Chapter 1 was insane. Massive Pirate charge from the beginning + no healing items (only forts) + all of your units, with the exception of Doga, can be killed in 2 or 3 hits (Doga takes 4, if he's armed).
Honestly, I had Jeigan use a Silver Lance just to weaken some enemies, and even the Thief won't die to a single shot from that!
4. All enemies in that chapter had, I kid you not, A ranks with their weapon type. A is the maximum in this game, and the new formula says that it gives +3 attack. Most Pirates had 18 attack because of this.
5. Sure enough, the boss was also a complete psycho. Steel Axe and crazy high attack meant that only Jeigan (I think) could survive even one round with him...and not by much (22/22 -> 6 or 7/22, depending on weapon choice). Obviously, Javelins are the way to go when it comes to defeating him, but your hit rates hover around 30 - 5x% (Gordon had 5x% with a Steel Bow), so you better hope for tons of luck with that approach.
I tried that method for a while, but then the miss-fest began (the RNG of Chrono Cross followed me! NOoooOoOOOoooOoo!), so I changed it up a bit by making Jeigan counter with a Silver Lance every other turn (11 damage, 59%). Riff was unable to fix Jeigan's HP enough to do that every single turn, so this process took a while.
6. Chapter 2 is almost as bad, since you are immediately thrown into a warzone with enemies that mean business. In my second attempt at this chapter, I had to suspend because the battery light was red. I'll get back to it tomorrow though, of course.
In summary, I'd have to say this game is worth playing, but don't expect something super duper awesome (like Megami is, the first time around or so). If the difficulty stays like this or gets even harder, my opinion of the game will likely go up. That is, as long as they don't start doing any "cheap" forms of difficulty...
Saturday, August 23, 2008
Shin Ankoku: Day 8
I apologize for the lack of updates recently. As of now, I'm at Chapter 20 with a time of 17:44.xx. My team is a little one-sided in terms of class choices, and capacity isn't agreeing with me, so I have to leave various units out sometimes. For the record, I'm using all four Pegasus Knights, because I know they are good (from Monshou experience).
Notes:
1. I acquired all three orbs in Chapter 20, so now I have the broken Star Orb/Light Orb/Miracle Sword combo! Whee!
2. Chiki's in-game art makes her look like an elf, instead of "loli" bait. This is disappointing, considering she was quite hawt in Monshou Book 2.
3. Perhaps it's because I've never gotten very far in Ankoku, but I noticed a Book 2 map (mostly the same layout, but that's all) in this game. Pretty cool.
4. Quite a few of my units are close to promotion, but I'm still waiting until level 20 for everyone.
5. Some music changes have occured, so it has avoided Monshou's mistake of playing the same music track for a billion chapters in a row.
6. Lawrence looks like Solidus Snake (Metal Gear Solid 2). Not necessarily a bad thing, but it's very unoriginal of the artist.
7. Chapter 13 on level 5 Hard will probably be totally ridiculous. That chapter is filled with ballistae...
Tuesday, August 19, 2008
Shin Ankoku: Day 4
I'm up to Chapter 12 now, with a time of 11:57.28. I tried class swapping the Pirate guy to a Mercenary, but I just changed him back and benched him a chapter later. It's probably also getting close to the time where I need to decide what two Social Knights to stick with, and drop the other one. Hardain is doing very well (though a bit one-sided toward offense), and I guess Freyr is ok. Abel is the weakest link, so he'll likely be the one to get benched.
Notes:
1. Rena will easily hit level 20 before anybody else, so she'll probably be the first to get a promotion (considering I plan to keep her permanently).
2. Navarre's strength still sucks (7).
3. I checked Serenes Forest to figure out how to recruit Jake, since I wasn't going to restart and try more people. I had already tried the "seize, but leave him alive" plan before even playing the chapter seriously.
Turns out that you need Sheeda to talk to him after visiting Anna, but I don't use the class swap feature much (though I browse the selection often), so she would've been required to dodge a lethal shot to get in range. I'm not stupid enough to try that (and I don't use save points), so I just moved her in and used Warp to put her in a safe spot.
4. Linda's in-game art doesn't even compare to her official art (one of the few good pictures), which is sad. She also seems a bit hard to use, so I guess I'll have to baby her pretty soon or she'll be beyond hope (or rather, just not worth it).
5. Hardain's battle model is also generic, so it lacks the turban. :(
Monday, August 18, 2008
Shin Ankoku: Day 3
I'm up to Chapter 10 now, with a time of 8:33.45. You can see that I take my time, but I've generally tried to avoid wasting turns for no good reason (such as waiting around and healing when all enemies are dead). My current team is: Marth, Sheeda, Oguma, Navarre, Barts, Hardain, Abel, Freyr, Doga, Kashim, Rena, Maric, the Pirate guy, and Julian (when I have the space or want a Thief around).
Out of that group, Navarre and the Pirate guy are the ones disappointing me the most. Navarre's strength is sad (6), and the Pirate guy simply can't hit anything. I considered changing Navarre into something that would boost his strength, but the drawbacks are too high to be worth it.
Anyway, it's time to bring back the numbered list format I like so much:
1. This one gets first mention, because the potential is amazing. Apparently, there's an option (available from the start too!) to skip enemy turns entirely. No joke.
All you do is change to that setting in the options menu, and then sit through a black screen with the word "skip..." on it, for what I assume is a varying amount of time (depending on enemy count). After the screen goes away, it's your turn again, and crap happened. Obviously, this would be hard to get used to for casual play, but the feature just screams "Run this game!"
First "animations: off" in Megami, and now this? Thank you, Intelligent Systems.
2. Maria's in-game art actually looks good! This also means she doesn't look like a man! Huzzah!
3. Weapon triangle is just like Thracia: +/- 5%. Not exactly a good thing, but oh well.
4. Tomes don't consume usage if they miss. This is good.
5. Hand Axes aren't boomerangs anymore. This is also good, but I still hope for an overhead toss instead.
6. Forging is weird in this game, but drastically improved nonetheless. This time around, you enter the weapon shop from the base (don't remember about the ones on the field) and choose what weapon to alter. A lot of weapons can be played with, including Marth's Rapier and Sheeda's "Wing Spear" (or whatever the name is), but unfortunately, the guy won't touch Maric's Excalibur tome. I assume this means "real" personal weapons can't be messed with either, because of that fact.
Forging options: +/- 10 might, +/- 50% hit (1% increments), +/- 30% critical, and +/- 10 weight. As you can see, things have definitely improved.
7. The "talk" part of the status menu has been removed, so it's back to old-school when it comes to recruiting characters. This is a bit painful, but I'm managing well enough so far.
8. There was an Armor Knight with pink hair in Chapter 8, and he was tricky to recruit. I let him come to me the first time I tried the chapter, and none of my people could speak to him. Because of that, I restarted and tried a completely new batch of people, but no luck there either.
My next theory (still attempt two) was that maybe he would join after the chapter if he survived. Therefore, I did some warping and completed the chapter. Still nothing.
After this, I just decided to play through it and leave him alive if at all possible (even if I had to end the chapter with him around). After killing the boss, I noticed Sheeda could speak to him (a yellow square appears under the target when this is possible), and so I sent her over to him. +1 Armor Knight for my team after that, so I'm pretty pleased that I figured that out on my own.
9. Dragon stones function like they did in Fuuin and Seima, but with a noticeable drawback: they consume usage even if you don't attack. I noticed this when fighting the boss of Chapter 9, as I had Maric blast him from a distance the entire time.
Please note that they function on a "per morph" basis, so if they double in a battle, it only consumes one use.
10. Blizzard doesn't seem to be effective on Fire Dragons anymore. Thunder also isn't effective against Dragon Knights, but that's not exactly a huge surprise.
11. The battle model for Fire Dragons is really stupid looking. It's like some giant balloon animal.
12. Bantou's character art actually got a bit of an improvement, but that's not hard to do. Amazingly, he doesn't look like your other characters. Wow!
Sunday, August 17, 2008
Shin Ankoku: Day 2
I'm up to Chapter 7 now, and the in-game clock says 5:35.16. This means I average 2:47.38 per day, unless my math sucks. I'll make a numbered list of things I want to mention, since it eliminates some of the need for a "flow" to the ramble. Go go laziness:
1. I still haven't had any losses, but that's probably to be expected on something like Normal. I actually came really close to losing Oguma in Chapter 6, because of stupidity on my part. You see, Thieves are running around swiping all the goodies, and I wanted to stop them before they escaped (which I did).
Crap hit the fan when I got into a position where it seemed best to just charge in and kill as many of the enemies as possible before ending my turn. If I remember correctly, there were 8 enemies in the area: 1 Priest, 1 Thief, 2 Armor Knights, 2 Social Knights, and 2 Archers. Seems fairly tame for now, but I should mention that one of the Social Knights had a freaking Silver Lance...and I didn't see that coming at all.
Before ending my turn, I think I cleared out both Armor Knights and an Archer. I kind of figured Oguma was going to get roasted from focus fire, but then I saw the Silver Lance on the last guy during the battle animation, and that was obviously O_O. Luckily for me, he survived that turn with 1 HP left, and I went on to complete the chapter with some ease (though the boss was a bit of a pain).
2. A correction to what I said about animations before: Social Knights will double smoothly if equipped with a sword. Apparently, they forgot how Seisen/Thracia handled animations, which is a shame.
3. I passed by an arena in Chapter 4, but didn't actually use it in the real save (though I think I entered and left, after checking the music). The track when entering the arena and before you make a wager is a version of Seima's "Follow Me!", which is one of the many great songs on that soundtrack. Sadly, this version is very short.
Later on, I loaded my old Chapter 4 save to hear the arena battle track. I actually had to do this more than once, so that I could check the "arena win" track as well. The battle track is taken from Thracia 776, but I can't remember which one it is exactly. This version wasn't really a standout, and I've only heard it a few times, so that explains why I can't remember it that well.
[Edit]: I'm a moron. Vincent's site says that the arena battle track is from Souen. How did I screw that one up? O_o
All you get for winning is a little fanfare and some clapping. How stupidly dull.
4. Speaking of the arena, the dude asks if you want to continue on to the next battle after winning. While this would be neat for people who want to use the arena and keep a low turn count, it just doesn't seem logical. Last time I checked, your unit usually gets the crap kicked out of them after one round, and there is no auto-heal (I checked). Had to turn the game off before Oguma died, of course. That doesn't render my "no losses" comment invalid though, if you ask me.
5. Wendel now looks like the Pope. Seriously, go look at his in-game art and tell me he doesn't have that look to him.
6. Battle models do not sag at low HP or kneel when they die. Both of these were added to Megami, so to take a step backward like this seems stupid. "Oh, I'm dead. *Poof*" Over and over.
7. The Rescue command (and thus Give/Take) was removed. This is majorly stupid. Anybody who says otherwise is a moron, or just hasn't felt the joy of a well planned Rescue train.
On a similar note, I really wish Thracian style Rescue/Give/Take/Trade would return to the series. That opened up a lot of possibilities for awesome strategies and general fun.
8. The player character art continues to reek of cloning and fugly. I suppose Paola, Katua, and Est are supposed to look alike (sisters, I think), but why do they look like people on my team already? Why should they bear any resemblance to MALES on my team? Why does this art suck so much?
Oh wait, it's Masamune Shirow. Now I get it.
9. The enemy character art, on the other hand, isn't half bad. I remember the Chapter 3 boss looking pretty freaking cool (quite an evil looking dude), and I appreciate the updated versions of the Monshou (not sure about Ankoku) boss portraits. Those updates stay close enough to the originals to cause a grin, but also improve them a bit at the same time. Good job there.
10. The boss battle track is great. It easily makes you think of Monshou's version, but they improved this version by putting some fairly heavy guitars in there. It's a shame you don't hear it much though.
11. The Warp staff still functions like the Ankoku/Monshou/Thracia versions, so we can all agree that is a HECK YES.
12. Class swapping is weird. I have yet to actually change someone's class in my real playthrough (did this while testing the arena though), and I'm not quite sure if I will. Some people do seem better suited to a different class, but it doesn't "feel very Fire Emblem" to me. I imagine it adds some points to the replay value, but I think they are taking a step in the wrong direction with this feature.
It seems to me that if they keep this sort of thing going, and aren't careful about it, the series could be going the way of Langrisser.
For the uninformed, the basic idea (and my opinion) is that Der Langrisser (remake of Langrisser II) is the best game in the series. After this, they kept changing key elements in the gameplay, and the later games never regained the pure awesome of the tried-and-true tile-based/turn-based (I-talk-like-Grobyc!) system of Der Langrisser.
Call me paranoid if you wish, but this is just the feeling I get. The trend of pathetic difficulty and this save point/Battle Save nonsense doesn't exactly ease this suspicion either. I'll let height advantage (Megami) slide, because that was a logical and cool addition.
13. When looking at my class swap options, I can't help but think of the speed run possibilities there. The Rescue command may be gone, but the idea of having Jeigan (yes, I know he sucks) as a Dragon Knight or Swordmaster? Surely I can't be the only one seeing a gold mine in there somewhere.
Saturday, August 16, 2008
Fire Emblem: Shin Ankoku Ryuu to Hikari no Ken
Yes, it finally arrived. I placed a pre-order at Play-Asia on July 9th, and it started shipping on August 5th. That means it took 10 freaking days (including Sunday) to get here with the lowest grade shipping (though I chose the box instead of the paper sleeve thing). I know I brought it on myself, but in my defense, my other orders usually arrived with that same shipping option in about 5 or 6 days at maximum (or so I remember).
So now that I've gotten the chance to play the game, at a whopping 8 days after release, I'll ramble about my first (and second, if that counts the second session only) impressions of the game (I'm at Chapter 4, by the way):
1. Split screen is kind of difficult to get used to, especially in the introduction, because it just looks weird to see a "large" image spread over both screens. A good example is the shot of Sheeda, where the view scrolls slowly to left...eventually giving you a fairly lengthy shot of the pegasus's butt, because the top screen isn't showing much worth noting at the time.
In-game, the split screen also feels awkward (at this point?). The game is played on the bottom screen, and you can flip between two top screen modes: one is the equivalent to a jazzed up (and quite neat) Start menu from Souen and Megami, and the other is the equivalent to checking a unit's status screen (highlight a unit to view it automatically). A lot of the information is condensed for the latter mode, so there is only one status screen for everybody.
Also of interest is that the status screen mode will leave the unit last highlighted on the top screen, so you can probably use this for some sort of future reference. Pretty neat, at the very least.
2. The touch screen controls seem gimmicky and stupid to me. While it is interesting to select a unit and do things with simple pokes of the stylus, the thing seems much more suited to left-handed people (I'm right-handed). I say this because you can scroll with the stylus by dragging it around an area near the edge of the screen, but the command menu has very small targets to hit if you want to take specific actions (such as using items or changing equipment).
Then again, attacking is possible by poking the enemy, but this leads to a different point I need to explain first (#3):
3. Selecting one of your units and then selecting an enemy in range will automatically generate an arrow path to that enemy and bring up the attack menu as usual. This is pretty cool, because I can see this making things quicker for people with good coordination.
Also, pressing X or Y in the attack menu changes the weapon you are equipped with, which probably works well with what I just mentioned. Personally, I prefer the same old "bring up menu, choose weapon, roast face" approach with the D-pad. Holding Y increases scroll speed once again (it's been gone since Thracia!), so that is great for people like me.
4. Animations are pretty good overall, but the graphics on them suck goat balls in some ways. For example, this new Pirate guy looks just like the enemy Pirates, only in blue instead of orange/red (whatever it is). Obviously, this just makes things look painfully generic.
Another problem is the border around the battle models, which clearly clashes with some of the backgrounds. You get used to it, for the most part, but there really doesn't seem to be a good excuse for such a thing.
One other problem is that some classes don't double smoothly, but others do. Example: Marth gets attacked by an enemy, and then doubles. Instead of hitting once and returning for a second shot, he just does both attacks in one trip (like Megami does in most (if not all) cases). Social Knights, on the other hand, will make two trips. To further add to the "huh?" value, keep in mind that Paladins (Jeigan, in this case) do both attacks in one trip.
5. Let's be honest here, the character art sucks in general. I like a few pieces of the official art, but in-game, most of the characters I've seen so far (up to Chapter 4) are downright ugly. Honestly, it's like they didn't even try.
A while ago, Spineshark basically said something like "finally, Fire Emblem characters don't all look alike", in reference to a page of the Shin Ankoku official art that I linked him to (a view I don't agree with). This is mostly true for the Shin Ankoku official art (at the very least, Marth/Camus seem to be similar), but in-game is a completely different story.
Unless my eyes play tricks on me, a lot of my characters look like semi-clones, just with different expressions or hair color/hairstyle. I wish I were kidding, but it's true.
6. The map graphics and backgrounds are fantastic. Everything looks "grittier" to me, but that could just be because they actually have detail this time. By the way, the thought that the sprites look like Tear Ring knockoffs has kind of died out for now, because it's not really the case when you see them in action.
7. The game has 6 difficulty settings, and I decided against starting on the hardest one (Hard level 5) for my first playthrough....choosing Normal instead (the lowest). At this point, the game seems stupidly easy, but I figure that will change a little as I go on.
8. You are forced to sacrifice a character in the fourth part (I think) of the Prologue, because someone is required to play decoy for this ridiculous ambush. Now, before you say "you suck!", I should repeat that you are required to do this. The door to continue is locked, and you have no keys available (the only one you had was one use, and is used before that).
You can choose any character you want for this, except for Marth (obviously). I had read about this choice earlier, but I don't know Japanese, so I just sent Marth to the designated fort square first. I can only assume that the nagging that followed was basically saying: "You moron! You can't have Marth be a decoy for himself!"
After giving it some thought, I eventually decided to send Kain as my decoy. I probably should've sent Gordon instead, because I've always preferred Kashim as my bow user in Monshou. Oh well, too late now.
9. The music is pretty decent, but some of it comes across as wacked up Pokémon music at times*. Perhaps this is because of the crappy speakers on the DS?
* Trainer: "Jeigan! Use Bubblebeam NOW!"
Jeigan: "JEIGANANANANAN!"
10. Save points are on the map, but I've never used one. I don't plan to either, because save points are for complete morons who lack brainpower and can't handle anything resembling difficulty. I exaggerate, but I hope you understand that I just don't like the idea (or Megami's "Battle Saves" for that matter).
For the record, saving in Seisen is ok in my book (and should be done often).
Saturday, July 26, 2008
Rashômon
This blog was initially created for the purpose of talking about the new Fire Emblem game for the DS when I get the chance to play it (August 9th or later), or the occasional gaming ramble/rant, but I'm thinking movie related things will also be just fine.
Tonight (this morning, for the overly technical), I watched an old movie named Rashômon. I'm not a film buff or anything, so I'm more than likely behind on the times for this since it is likely considered a "classic."
Anyway, the movie is very...different. I knew the premise of the movie beforehand, but the pace is so amazingly slow for a movie that is (according to the sleeve) 1 hour and 28 minutes long. Just getting into the storytelling part itself seemed to take an overly long time, but the music was pretty good there, which helps relieve that a bit.
By far the best part of the movie was Tajômaru (Toshirô Mifune), the "bandit" in the story. He had a great maniacal laugh that he would use quite often, and it was amusing to hear almost every time. He was also the most likable character in the movie, partly because it seemed like he wasn't completely evil.
Also interesting was the dubbing used when the medium* was telling the story from the husband's perspective. Considering this was back in 1950, the use of a man's voice from a woman's body must have been quite unique.
*Now, I feel the need to note that this kind of thing is screwed up and not right, but it is just a movie, after all. Perhaps one needs to keep in mind culture differences at a time like this.
I won't reveal any further plot details for the sake of those who have yet to see it, but to me, the mystery is definitely one to think about for some time. Honestly, I still don't understand it all even after watching the movie, though I do have a guess as to the correct conclusion. I'll have to give this some further thought, or watch the movie again with the audio commentary tomorrow, to see if that ties up the loose ends.
Overall, I'd say this movie is worth your time if you have the patience to sit through four different versions of the same basic events. I wouldn't place it at the 8.5/10 ranking it currently has on IMDB, but I would have to give it at least a 7.5/10.
Subscribe to:
Posts (Atom)