Monday, September 29, 2008

16.57 is ridiculous.

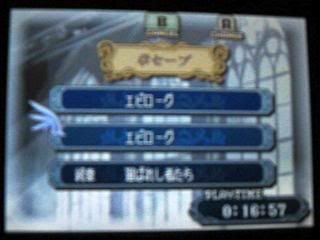
I'm late posting this, but I'll go ahead and note that I completed my fourth (and likely final) test run of Shin Ankoku on September 24th. The final time was 16.57, and I can honestly say it that would be outrageously difficult to lower that by a substantial amount.

I looked over my third run and determined some things that I could cut out, and so no shopping or forging is done at all this time around. I also made sure to use all three save slots in order to be extra picky about the time for each chapter, and for maximizing Marth's level ups. While this made the whole process take a lot longer to complete, it definitely paid off for my in-game time.

Edit: Screenshot added because I can (click for larger version):

Chapter breakdown:

Prologue 1: Make sure Marth gains strength, at the very least. Speed is no doubt helpful, but he needs that point of strength to one round that Axe Fighter in Prologue 2.

Prologue 2: Only move Marth and obtain as many self-defense kills as possible, since they are quicker. Ignore the Archers.

Prologue 3: Only use Marth and Jeigan here, but have Freyr give Marth his Iron Sword and Vulnerary on turn one. Jeigan's purpose for this chapter is merely to soak up some damage and kill the yellow square Mage. Use Vulneraries with Marth as necessary, because hoping for fantastic evade is too absurd to bother with.

Prologue 4: Marth should kill the Hand Axe guy on turn one, and then Jeigan slaughters the Archer on turn two by using the Silver Lance. Marth is to move toward the boss while Jeigan's only remaining purpose is to kill Gordon (easily faster than sacrificing a unit).

If things have been going properly, Marth's Iron Sword should be at 6/40 when approaching the newly opened door. Two of those go to the Archer in front, and the other four obviously go to the two Soldiers standing behind that guy. All so very convenient, don't you think?

Anyway, the rest is simple. Move Marth up and Rapier the boss into a pile of goo. Be ready to skip the scene and the reinforcement appearance soon after emerging from the other end of the Gordon area.

Chapter 1: This one is extremely straightforward. Marth moves above the left tree on turn one, to the middle tree (it should be obvious which one I mean) on turn two, and then make your way to the boss from there. If you get lucky, the Hunter will attack from one space below and to the left of Marth, making the move to the left slightly faster.

For the boss, you have a decision to make: strike first and waste time with the pre-fight dialogue and Enemy Phase heal (all of which can be sped up, but still wastes some frames anyway), or counter critical at some single digit percentage. Keep in mind that you have no save points to make use of to make this manipulation easier.

Chapter 2: Move Jeigan onto the north bridge, so that he can protect your other wimps. This is important, because less characters risks getting slapped with a Gaiden chapter, which is unacceptable in all cases except 24x. Marth moves left and eventually crosses the river manually, getting a ton of self-defense kills. Kill the boss in self-defense as well, and a winner is you.

Chapter 3: Move Rena down, Marth obviously goes left, and leave Julian to rot. Continue to move those two units until Rena is very close to the fort, at which time you should move Jeigan two spaces above that fort. Keep a close eye on the radar on the top screen as turns begin/end, so that you can tell if Jeigan survives or not. If he dies, Rena is obviously going to become toast, which is crippling.

After stopping Marth next to the boss, I'd recommend pressing L and having the nearest unit use the save point at the starting location. Manipulate a low chance critical and win.

Chapter 4: Equip Marth with a Rapier (or do this in Chapter 3, which may be a better idea) and Warp him to the boss. Marth should have a full inventory by this point, so when he counter kills the boss (which is very important), you should send the Rapier into storage. Hope that Marth kills the peons so that the gate is clear, then seize. Send the Knight Killer back when you get the free Silver Sword.

Chapter 5: Marth goes to the boss and you should leave everyone else to rot. I had Marth kill the boss with a Rapier while standing on his left side, but standing below him probably works just as well. Standing on his right side is a bad idea because if Marth takes damage, you'll waste time from the auto-heal. Send the Rapier back if you want to be sure of the usage.

Chapter 6: Warp Marth and counter kill the boss with a Rapier, which will likely require at least one critical hit. Send it back if you wish.

Chapter 7: Only deploy Marth and move toward the right side of the boss when you get the chance. You should probably send the Rapier back.

Chapter 8: Warp Marth and drop the boss in self-defense (as usual).

Chapter 9: Warp Marth and win. You can pretty much use whatever weapon you want, so send back the Door Key that the boss drops.

Chapter 10: Warp Marth and hope the boss dies during the Enemy Phase. Send the Rapier back when he does. Minerva will likely commit suicide, so send her axe back too.

Chapter 11: Warp Marth and win. If you have any trouble here, you're a moron.

Chapter 12: Kill the Warp Thief with a person that has a full inventory, and then have Rena fetch it from storage and use it. Send Marth to the right side of the boss and drop the Priest. Smoke the boss on the next turn, and then seize on turn three. Obviously, he'll need some luck to survive all this.

Chapter 13: Warp Marth to the boss and drop him, since you can't do so in self-defense. If he gains a level from this kill or from killing Astoria, waste a turn and let the level up occur during the Enemy Phase of turn one (from Astoria). Even though it increases your turn count by one, it should be a tiny bit faster overall (especially if it was some sort of super level up).

Chapter 14: Warp Marth and counter kill the boss with a Rapier, then send it back. Hope that Rena dodges the ballista shot during the Enemy Phase, because a single shot will more than likely kill her. Use the unit count and/or radar to determine her status before turn two begins (to save time).

Chapter 15: Warp Marth to the generic "boss" and then drop him, since you can't get a self-defense kill here. Extremely easy chapter.

Chapter 16: Warp Marth to the left side of the boss and Rapier counter kill him (send it back). You'll also need to hope Marth survives, because he'll be enduring some serious abuse. If an enemy clogs the gate before turn two, restart.

Chapter 17: Move Jeigan and Zagaro toward the area where the Warp Thief will escape to. Avoid being in range of the Armor Knights on turn one, and then rush in after that. Warp Marth to the boss one turn before obtaining the new Warp staff. Kill the boss in a counter and then use Jeigan and Zagaro to kill the Warp Thief (send the staff back, if possible) before seizing the throne.

Chapter 18: Warp Marth to the left side of the boss and counter kill him with the Rapier. Definitely send the thing back afterwards, because you don't want to slaughter the whole army in that area with it.

Chapter 19: Warp Marth to Chiki and it's up to you whether to strike first or not. I'd probably do that, since her damage might be a little excessive considering you need Marth to survive several magic attacks and some Heroes.

Chapter 20: This one suffers from the lack of Boots. Drop someone from your group so that Rena can be one space below Marth, Warp Marth to the village, visit it, and then have him run back to the right (using Vulneraries on the way, if need be). Your next goal is to have Rena meet him and then Warp him to Lawrence so that he can recruit him that turn (cannon fodder).

While doing this, move Zagaro or some other high movement unit toward the save point. Save on the turn that you send Marth to Lawrence, in case Camus roasts Marth. Saving obviously wastes time though, so if you feel confident in Marth's survival skills, avoid the save entirely.

Chapter 21: Send Marth to the boss on turn one and repair a Warp staff on turn two. If you are having troubles with that Enemy Phase, you could try repairing first and sending Marth over later. This will cost you a turn though, so keep that in mind.

Chapter 22: Warp Marth to the boss and hope for survival and a clear gate. Seize on turn two.

Chapter 23: Warp Marth to the generic boss and hope things go well (pretty easy, actually). Seize on turn two.

Chapter 24: Same as the plan for Chapter 22.

Chapter 24x: Same as the plan for Chapter 22, but with a throne instead of a gate. One or two of your units might die here, but it doesn't matter (as long as it wasn't Rena or Ellis).

Chapter 25: Drop everybody except Marth, Rena, and Ellis. Give Ellis one of Rena's Warp staves and make sure both of them are in position near Marth. Warp Marth and Nagi to either side of the Mamkute and have Nagi drop him. Use Marth to critical Medeus for the kill. Keep in mind that you need 23 strength to kill Medeus in a single shot (with the fake Falchion) and that you will save a good chunk of time by making it a one shot kill. No save points are available to you, so I highly recommend saving after the preparations.

Well, there you have it. That is how I did this 16.57 run, and that is how I think any run of this game should go. Good luck to anybody who wants to try this.

Friday, September 19, 2008

Three test runs and counting.

I did another run this morning (finished at some time after 3 A.M., at least), and improved my time to 23.58. I won't be recording the results video for it this time, but I did log the times and turn counts: http://www.geocities.com/kessenaddict/shinankokutimes.txt

I cut out a lot of excessive inventory and unit management, and cut back on the shopping. I still ended up with some more gear than I needed though, so I think it is best to do absolutely no shopping at all. The gold bag from the chest in Chapter 6 never served a purpose this time around, so drop that too. Also, I need to keep a better eye on Marth's stats next time (if there is a next time), because he suffered from stupidly low skill all game long.

Marth lacked the strength to one shot Medeus by having only 22 strength when you need 23 (at least), and also lacked the speed to double. Therefore, my only choice was to have Marth take care of the Mamkute guard and let Nagi handle Medeus. The things is, Marth also lacked the speed to double that guard, and so he required a critical to drop him. Combine this with Nagi's need of a critical (for that same reason) on Medeus at 9%, and you have a recipe for pain.

To somewhat fix this, I forged a higher critical rate on Marth's Silver Sword (using all the on-hand money I could), giving it +17%. This brought his total to 24%, which is somewhat acceptable. I got both the necessary criticals after a fairly short round of attempts, so all is well.

By the way, for those who care, I let quite a few people die (on purpose).

Wednesday, September 17, 2008

Four more playthroughs.

It's been a LONG time since the last update, I know. I completed Hard 5 a long time ago and four other playthroughs since the last update. These playthroughs were (in order): all Gaiden chapters, Marth + generic replacements, test speed run, and another test run. All four of those were done on Normal mode, for those who care.

List format because I'm lazy:

1. Gaiden chapter requirements are stupid, and the chapters themselves are mostly meh. 24x and the one with Etzel were interesting though, because of their layout. 24x is a Fuuin 16x clone (towers) and Etzel's chapter has the only instance of indoor areas being masked until you open the door (or get close enough, in one case). Other than that, the Gaiden chapters just carry a short-lived "oh, neat" effect.

2. Generic units are interesting at first, because who hasn't wanted to throw some random units around in a Fire Emblem game (outside of Thracia)? Unfortunately, once the few chapters of novelty wears off, things just get horribly BORING. Their growths are awful, so giving them level ups is pretty much pointless. The only possible way to produce any real "fun" from using generic units is if you play on a harder setting (like Hard 5), but even then, there is no good reason to use any of them for more than meatwall duty. Take my advice, and NEVER try this playthrough (unless you plan to convert it into a Marth solo).

3. Test run one was done in less than a day, without much more than basic planning. It was rough in quite a few areas, but the overall time wasn't too bad for a first attempt: 1:08.07. The main idea of any run is to do a Marth solo (basically) with Rena making smart use of the Warp and Hammerne staff. A video of my results is here: http://www.youtube.com/watch?v=9ewNtbOq7qU

4. I did another test run the next day, knowing that I could shave off at least a few minutes from the previous attempt. Imagine my surprise when I achieved a final time of 32.01! I had written down some basic plans for each chapter, and included which ones to use Warp on. I also made sure to fix a mistake from last time, which was "ARGH, I didn't train Marth enough early on." By wasting some time to let Marth soak up most of the early game experience, he becomes more than capable of quickly completing chapters. In this case though, his defense was a bit poopy early on and so I had to have Jeigan help him out.

Anyway, the plans went well for the most part. Chapter 12 gave me some trouble though, because the idea was to kill the Warp Thief with someone that had a full inventory, send it to the convoy, and then have Rena fish it out and use it. Marth gets sent to the Boots chest, opens it, and spends a little time waiting for the two Mages to go up the left side of the map. Marth's resistance sucks, so dealing with them AND the other enemies is not a smart idea. It works out decently, because you get the chance to use a Vulnerary or two and/or the Boots while hiding in the closed room.

For those who may be curious, here is the rough document I wrote up:

P-1: Straightforward.
P-2: Kill everyone with Marth?
P-3: Kill everyone with Marth?
P-4: Kill everyone with Marth.
1: Kill everyone with Marth.
2: Marth left, people die.
3: Marth left, Oguma fort/mountain. No Warp.
4: Warp Marth and win. (6)
5: Use Marth and win. No Warp.
6: Warp Marth and win. (5)
7: Use Marth and win. No Warp.
8: Warp Marth and win. (4)
9: Warp Marth and win. (3)
10: Warp Marth and win. (2)
11: Warp Marth and win. (1)
12: Marth kills the Armor Knights, someone kills the Warp Thief, Warp Marth to Boots, and win. (1/6)
13: Warp Marth and win. (1/5)
14: Warp Marth and win. (1/4)
15: Warp Marth and win. (1/3)
16: Marth counter-kills the three Dragon Riders, Warp Marth to boss, and win. (1/2)
17: Move up-left and ambush the Warp Thief, Warp Marth to the boss, and win. (1/1/7)
18: Warp Marth to the boss (left-side) and kill him with a full inventory (to send the Rapier away). (1/1/6)
19: Warp Marth to Chiki and win. (1/1/5)
20: Warp Marth to village, recruit Lawrence, and win. (1/1/4)
21: Warp Marth, repair a Warp staff, and win. (7/1/3)
22: Warp Marth and win. (7/1/2)
23: Warp Marth and win. (7/1/1)
24: Warp Marth and win. (6/1/1)
24x: Warp Marth and win. (5/1/1)
25: Warp Marth, Warp Nagi, and win. (4/1)

At the end, I use Rena and Ellis to send Marth and Nagi (joins in 25 if you went to 24x) to Medeus. Nagi annihilates the Mamkute in front of him, and Marth uses the wimpy Falchion to kill Medeus. In this case, Marth was capable of dealing 17 damage per hit (Medeus has 60 HP here) with an 8x% hit rate and 8% critical. Luckily, Marth was fast enough to double, so all I had to do was keep restarting the chapter until one of the hits was a critical. Best case scenario is if you get a Marth capable of dealing 20 damage per hit, but I'm not sure if that is possible without the orb that negates any terrain bonus. Getting said orb would waste more time than it saves, by the way.

Gold is a bit of an issue throughout this run, because I like to have a decent load of general purpose swords for Marth to use AND a forged Rapier + forged Dragon Killer. I had Julian grab the first chest in Chapter 6 (money bag), since it was helpful and easy to get. Other than that, the only other gold I remember grabbing was in Chapter 1.

I'll probably do another run at some point, with some more tweaks. At the very least, I'll look at what I ended the game with this time and drop the excess. Combine that with better levels for Marth early on, and I can see sub-30 minutes happening.

Finally, here is a video of my second run results: http://www.youtube.com/watch?v=Jr-ukF5FSn4

Thursday, August 28, 2008

Shin Ankoku: Who cares what day?

I'm now up to Chapter 8 on Hard 5, and I have a confession to make: I...used a save point once. Yes, it is very shameful to do such a thing, but believe me when I say I wasn't eager to make the decision to use it. Here's the situation:

Pretty late in Chapter 5, with Social Knights and Pegasus Knights spawning out of various forts at an absurd rate (they appear on the beginning of the Enemy Phase too). The Social Knights aren't a huge concern, because I could've easily made a chokepoint or two and healed the meatwall(s) while blasting away.

The real problem was with the Pegasus Knights, because chokepoints mean nothing to them. In addition to this, they were armed with Javelins, which does not bode well for a meatwall (Steel Lance hit from the Social Knight and then a Javelin hit would easily be fatal). They were so powerful that even Wolf or that other Horseman were completely worthless against them, because a Steel Bow hit would not be fatal and they would receive a fatal double in return. Stupidly, the only unit capable of winning against one of them with some ease was Marich with Excalibur.

Anyway, the mistake I made was actually the second time I did it in the same attempt, so you'd think I would have learned from before. The mistake was to get too aggressive, which lures a Pegasus Knight towards my main team (on the right side of the map). Because of this, you end up with two choices: retreat and make absolutely sure to limit the attacks received to one round per unit (any more would be fatal), or go all out and limit the attacks received by reducing enemy count.

The first choice tends to run into problems with movement. Your weaker characters have a harder time getting behind your new wall, and Social Knights have 9 movement, which makes an effective wall difficult to construct.

The second choice was what I went with the second time around, and is the reason I used the save point. There were three enemies left in the area (one Pegasus Knight and two Social Knights), and I had used a unit or two more than I would've liked. I was left with a few specific units to kill off some rather super enemies, so things were pretty bad.

Once I finally decided on a plan, I knew Sheeda would be required to drop the full HP Social Knight in a single hit, because evade is pretty unheard of in this game (excluding ballistae attacks). To do this, I needed a critical hit at around 23% with the Wing Spear, and by this point, I wasn't fond of the idea of staking my progress on such low odds. This is why I saved.

Sure enough, the first try gave me a normal hit. I reset and then tried again, and got the critical hit I needed. After that, the chapter was mostly a cakewalk (especially because I had a save to fall back on if I really wanted).

So there you have it. I still strongly disapprove of using save points, but I feel it was slightly justified in this instance. Regardless though, what's done is done.

Monday, August 25, 2008

Shin Ankoku: Day 9

I completed Normal mode in somewhere around 23 hours. The game sort of gets old as you get close to the end, but I had a lot of saved up Warp uses to get things over with fairly quickly at the very end.

Speaking of the end, Medeus's battle model is stupid looking. It doesn't even come close to looking as good as Monshou Book 2's version (which was awesome), but I suppose it's a small step up from Book 1. Or at least, it would be, if the 3D model used for him didn't suck so much; because of that, it becomes a contest between poor 3D and a giant yellow mole.

Also worth noting that the ending, regardless of the fact I can't understand anything that was said, looked terrible. Some short dialogue (considering it's supposed to be an ending) between various people, a picture, and then very short endings for each character. Was it too much to ask to get an ending worth watching at least once? What happened to the "perfect" ending from Monshou? That sucker was long and seemed to contain tons of information.

Anyway, now that I've checked around various areas online, I'll note some things:

1. Normal mode is the only mode with Freyr and some replacement dork named Naron. I can see that changing, simply because adding a new character for only one mode (Naron doesn't matter much) isn't a good idea.

2. The reason they aren't available is because the Prologue maps are skipped entirely in Hard mode. This means it's a good thing I chose to play Normal first! :)

3. I started a Hard level 5 save (screw the stuff in-between!) a while ago, and WOW is it hard. It's like playing Souen Maniac all over again, only with an even less capable Jeigan (heh, get it?). Keep in mind, I'm only on Chapter 2, so this statement about the difficulty could change as I get farther in the game.

That said, Chapter 1 was insane. Massive Pirate charge from the beginning + no healing items (only forts) + all of your units, with the exception of Doga, can be killed in 2 or 3 hits (Doga takes 4, if he's armed).

Honestly, I had Jeigan use a Silver Lance just to weaken some enemies, and even the Thief won't die to a single shot from that!

4. All enemies in that chapter had, I kid you not, A ranks with their weapon type. A is the maximum in this game, and the new formula says that it gives +3 attack. Most Pirates had 18 attack because of this.

5. Sure enough, the boss was also a complete psycho. Steel Axe and crazy high attack meant that only Jeigan (I think) could survive even one round with him...and not by much (22/22 -> 6 or 7/22, depending on weapon choice). Obviously, Javelins are the way to go when it comes to defeating him, but your hit rates hover around 30 - 5x% (Gordon had 5x% with a Steel Bow), so you better hope for tons of luck with that approach.

I tried that method for a while, but then the miss-fest began (the RNG of Chrono Cross followed me! NOoooOoOOOoooOoo!), so I changed it up a bit by making Jeigan counter with a Silver Lance every other turn (11 damage, 59%). Riff was unable to fix Jeigan's HP enough to do that every single turn, so this process took a while.

6. Chapter 2 is almost as bad, since you are immediately thrown into a warzone with enemies that mean business. In my second attempt at this chapter, I had to suspend because the battery light was red. I'll get back to it tomorrow though, of course.

In summary, I'd have to say this game is worth playing, but don't expect something super duper awesome (like Megami is, the first time around or so). If the difficulty stays like this or gets even harder, my opinion of the game will likely go up. That is, as long as they don't start doing any "cheap" forms of difficulty...

Saturday, August 23, 2008

Shin Ankoku: Day 8

I apologize for the lack of updates recently. As of now, I'm at Chapter 20 with a time of 17:44.xx. My team is a little one-sided in terms of class choices, and capacity isn't agreeing with me, so I have to leave various units out sometimes. For the record, I'm using all four Pegasus Knights, because I know they are good (from Monshou experience).

Notes:

1. I acquired all three orbs in Chapter 20, so now I have the broken Star Orb/Light Orb/Miracle Sword combo! Whee!

2. Chiki's in-game art makes her look like an elf, instead of "loli" bait. This is disappointing, considering she was quite hawt in Monshou Book 2.

3. Perhaps it's because I've never gotten very far in Ankoku, but I noticed a Book 2 map (mostly the same layout, but that's all) in this game. Pretty cool.

4. Quite a few of my units are close to promotion, but I'm still waiting until level 20 for everyone.

5. Some music changes have occured, so it has avoided Monshou's mistake of playing the same music track for a billion chapters in a row.

6. Lawrence looks like Solidus Snake (Metal Gear Solid 2). Not necessarily a bad thing, but it's very unoriginal of the artist.

7. Chapter 13 on level 5 Hard will probably be totally ridiculous. That chapter is filled with ballistae...

Tuesday, August 19, 2008

Shin Ankoku: Day 4

I'm up to Chapter 12 now, with a time of 11:57.28. I tried class swapping the Pirate guy to a Mercenary, but I just changed him back and benched him a chapter later. It's probably also getting close to the time where I need to decide what two Social Knights to stick with, and drop the other one. Hardain is doing very well (though a bit one-sided toward offense), and I guess Freyr is ok. Abel is the weakest link, so he'll likely be the one to get benched.

Notes:

1. Rena will easily hit level 20 before anybody else, so she'll probably be the first to get a promotion (considering I plan to keep her permanently).

2. Navarre's strength still sucks (7).

3. I checked Serenes Forest to figure out how to recruit Jake, since I wasn't going to restart and try more people. I had already tried the "seize, but leave him alive" plan before even playing the chapter seriously.

Turns out that you need Sheeda to talk to him after visiting Anna, but I don't use the class swap feature much (though I browse the selection often), so she would've been required to dodge a lethal shot to get in range. I'm not stupid enough to try that (and I don't use save points), so I just moved her in and used Warp to put her in a safe spot.

4. Linda's in-game art doesn't even compare to her official art (one of the few good pictures), which is sad. She also seems a bit hard to use, so I guess I'll have to baby her pretty soon or she'll be beyond hope (or rather, just not worth it).

5. Hardain's battle model is also generic, so it lacks the turban. :(